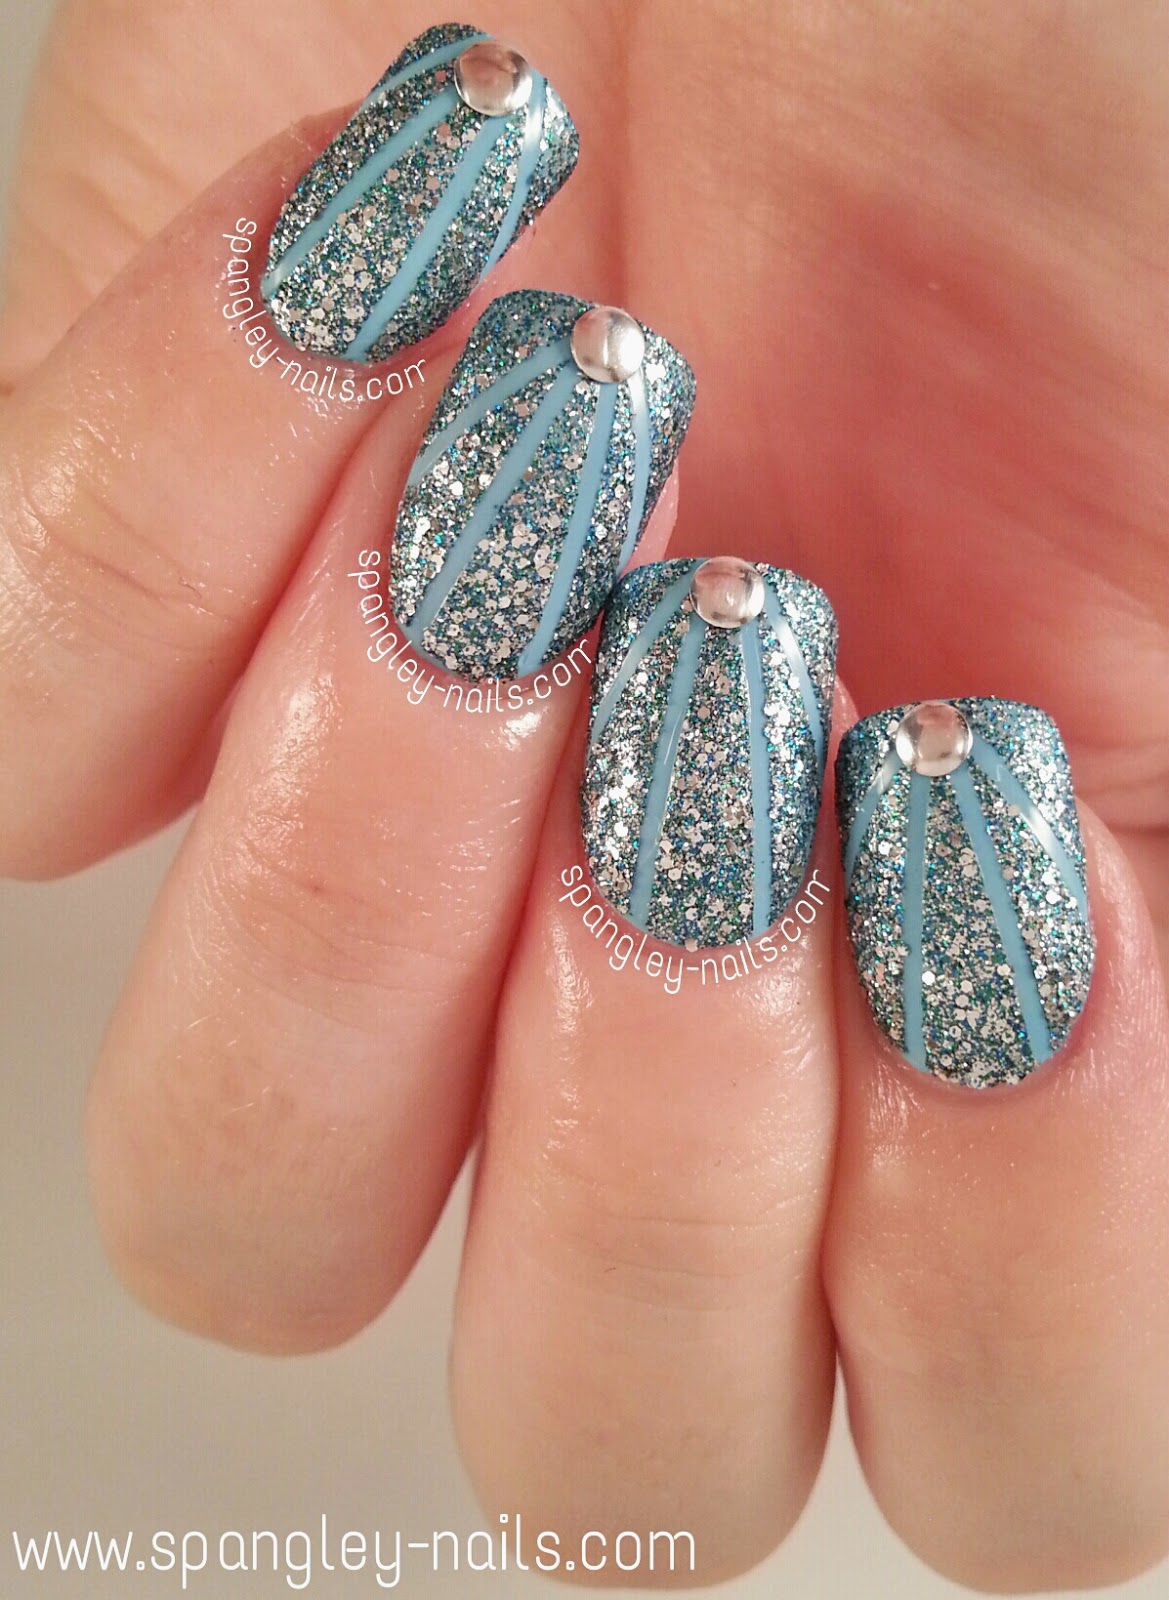
Polishes Used:
Rimmel - Too Cool To Tango (Pictured)
nails inc - Hammersmith
Seche Vite
I started off by painting all of my nails with Too Cool To Tango and added a thin coat of Seche Vite to speed up the drying process for me to apply my striping tape to.
I then added 4 pieces of striping tape to each nail, from the middle bottom outwards and covered my nail with a coat of Hammersmith. Immediately I pulled the striping tape off my nail with tweezers - before the polish dried.
At the bottom of my nail - where the striping tape lines met - I added a dot of Seche Vite, to act as glue for the silver studs & I added one to each nail. I did not add a coat of Seche Vite to the finished manicure, because Hammersmith is a 3D Glitter polish and I did not want to ruin that effect.
Did you enjoy today's post? Then stay in touch! Subscribe to Spangley Nails by Email and you'll never miss a post!


No comments:
Post a Comment